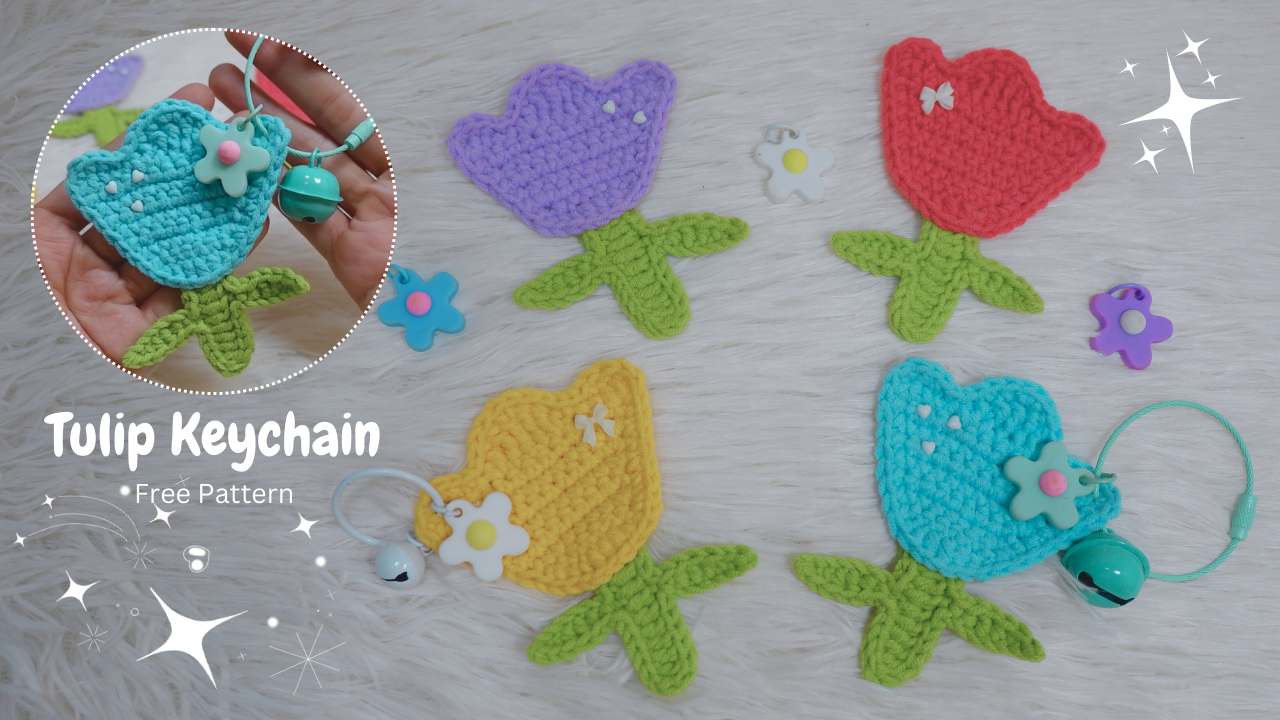
🌷 Whether you’re new to crochet or just looking for a fun and quick project, you’re in the right place. Today, we’re diving into creating a delightful Tulip Keychain that’s perfect for beginners. This adorable accessory not only makes for a charming gift but also adds a touch of handmade beauty to your keys, bags, or anything you fancy!
In this easy-to-follow tutorial, we’ll guide you step-by-step through the process, from picking out your yarn to adding the finishing touches. No need for fancy tools or advanced skills—just a bit of yarn, a crochet hook, and your creativity.
Let’s get started on making a lovely Tulip Keychain that you’ll be proud to show off! 🌟.

*Notes:
- This Pattern follow US crochet terms
- Number of stitches indicated between “<>”. Ex. “<23 st total>”
*FREE DOWNLOAD “TULIP KEYCHAIN” PDF PATTERN*

Materials:
- Milk Cotton Yarn
- Crochet hook – Size H/3.00mm hook
- Scissors
- Stitch marker
- Needle
Abbreviations:
- sl st: slip stitch
- St: stitch
- Ch: Chain
- Inc: Increase
- Sc: Single crochet
- Dc: Double crochet
- Hdc: Half Double crochet
- Trc: Triple crochet
- Dtr: Double triple crochet
Patterns:
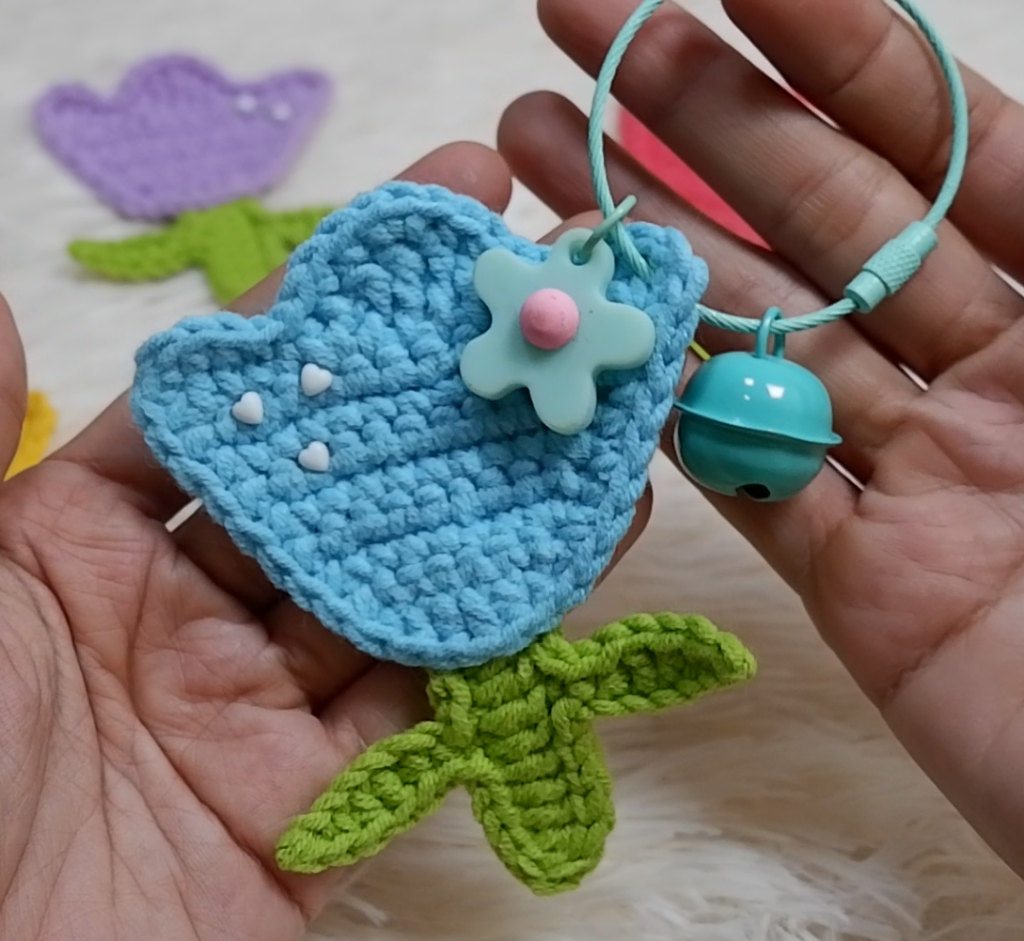
1. Tulip
Row 1: <7 st total>
- Begin with sl knot
- Ch8, 7sc into 2nd ch from the hook, ch1 and turn
Row 2: <9 st total>
- Inc, 5sc, inc, ch1 and turn
Row 3: <9 st total>
- 9sc, ch1 and turn
Row 4: <11 st total>
- Inc, 7sc, inc, ch1 and turn
Row 5: <11 st total>
- 11sc, ch1 and turn
Row 6: <13 st total>
- Inc, 9sc, inc, ch1 and turn
Row 7: <13 st total>
- 13sc, ch1 and turn
Row 8: <17 st total>
- (2hdc into the same loop), 2sc, sl st, (1hdc, 1dc into the same loop), 1trc, 1dtrc, 1trc,
(1dc, 1hdc into the same loop), sl st, 2sc, (2hdc into the same loop)
Rnd 1: <40 st total>
- Ch1, 10sc, 3hdc, 10sc, 3sc, 3sl st, 2sc, (3sc into the same loop), 2sc, 3sl st, 3sc, sl st and bind off.
2. Tulip Stem and Leaf
- Begin with sl knot
- Ch12, 10dc into 3rd ch from the hook, ch2, sl st
- 4sl st, ch7, sl st, 1sc, 1hdc, 1dc, 1hdc, 1sc, 12sl st
- ch7, sl st, 1sc, 1hdc, 1dc, 1hdc, 1sc, 8sl st, bind off.
Note: Attach all parts together using needle and thread or glue.
*More detail watch my video tutorial*


